Use your browser’s Print function (Ctrl+P / Cmd+P) to print this checklist or save it as a PDF. Check off each item before every tow.
TowPro Academy Pre-Trip Towing Checklist
Complete this checklist before every tow — from Class C pickup trucks to 37-foot fifth wheels.
1. TOWING VEHICLE — UNDER THE HOOD
2. TOWING VEHICLE — TIRES & WHEELS
3. HITCH SYSTEM
4. SAFETY CHAINS & BREAKAWAY
5. TRAILER LIGHTS & ELECTRICAL
Most of this list becomes muscle memory once someone shows you why each step matters — and what it looks like when it goes wrong. That is what the TowPro Academy Class C towing course covers: 55 lessons from hitching through emergency handling.
6. TRAILER TIRES & WHEELS
7. LOAD & WEIGHT DISTRIBUTION
8. TRAILER DOORS, VENTS & EXTERIOR
9. INSIDE THE TRAILER (RVs & Campers)
10. FINAL WALK-AROUND — 5-MINUTE RULE
11. CLEARANCE & HEIGHT
The Hook-Up Sequence
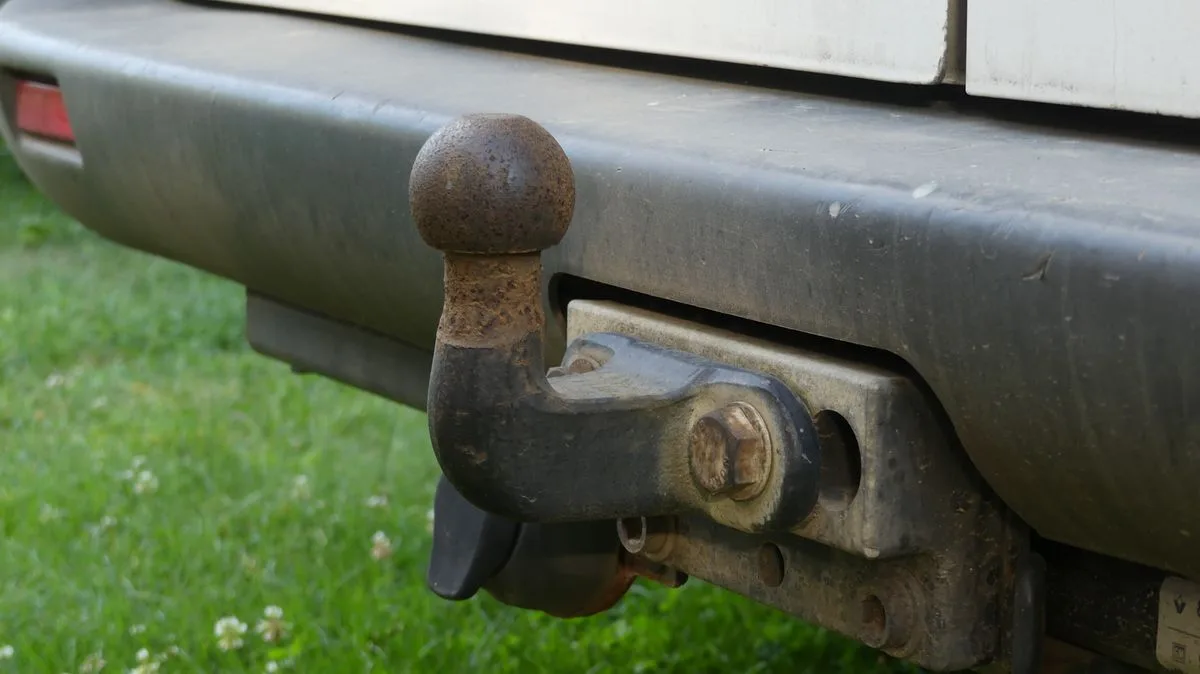
Sections 3, 4 and 5 of the checklist above cover the connection between truck and trailer. Run them in this order every time, because each step depends on the one before it.
1. Lower the coupler onto the ball and latch it
Lower the tongue until the coupler drops fully onto the hitch ball, then close the latch. It should click or engage completely rather than resting on top of the ball. Once it is latched, raise the jack slightly and tug up on the tongue: if the coupler lifts off the ball, it was never seated. That one tug test catches most improperly latched couplers before they reach the road.
2. Insert the coupler lock pin or lock
With the latch closed, drop in the safety pin, R-clip or coupler lock so road vibration cannot bounce the latch open. Some couplers use a simple pin and clip, others take a keyed lock. Either way, do not skip it — an unpinned latch is one of the most common ways a trailer separates from a truck.
3. Attach the safety chains
Cross the chains under the tongue in an X pattern and connect both to the tow vehicle chain hooks or receiver loops, never to the ball mount alone. The X cradles the tongue if the coupler ever lets go and keeps it off the pavement. Leave enough slack to turn, but not enough to drag.
4. Connect the breakaway cable (if applicable)
Any trailer with electric brakes has a breakaway cable. Clip it to the hitch receiver or a dedicated loop on the truck — not to the safety chains, which would defeat it at exactly the moment the chains are doing their job. If the trailer separates, the cable pulls a pin and applies the trailer brakes. Give it enough slack for tight turns and no more.
5. Plug in the trailer wiring
Connect the trailer plug to the truck connector: 4-pin covers running, brake and turn lights, while 7-pin adds electric brakes, reverse lights and 12V power. Seat the plug fully, check the pins for corrosion, and route the cable so it cannot stretch or drag on a sharp turn. Then walk the trailer with a helper and confirm running lights, brake lights and both turn signals before you move.
Install and Adjust the Weight Distribution Hitch
If your trailer weighs more than roughly 5,000 lbs, or the tongue weight is high enough to squat the truck, a weight distribution hitch (WDH) is usually required. Before the trip, confirm the spring bars are fully engaged and the system is adjusted correctly: hitched up, the front of the truck should sit close to its unloaded height and the rear should not be squatting dramatically. If you are not sure, measure both fender heights unhitched and hitched and compare. An improperly set WDH is worse than no WDH at all — it can unload the front axle, lighten the steering and make sway more likely rather than less.
Clearance and Height: Know Your Three Numbers
Height, width and combined length are the three numbers every tow driver should be able to say out loud, and they are what item 11 on the checklist is asking for. Measure the trailer at its tallest point — usually an air conditioner shroud, vent or antenna rather than the roofline — and write it on a card on the visor. Bridges, gas station canopies, drive-thrus and low branches are where guessing gets expensive. Width decides whether you clear gates, narrow roads and a busy fuel island. Combined length decides your turns, your merges and where you can legally park overnight. Standard car GPS routing knows none of this, so check the route for low clearances and weight-restricted bridges before you leave, not at the last exit.
How Long Should a Pre-Trip Inspection Take?
A thorough pre-trip inspection takes 5 to 10 minutes once the routine is automatic. If you are new to towing, allow 15 to 20 minutes and work through the checklist item by item instead of from memory. Do not rush it and do not skip it on familiar trips — that is exactly where most drivers get caught out. The ten minutes you spend in the driveway is insurance against hours on the shoulder, or worse.
Pre-Trip Towing Checklist FAQs
What should I check before towing a trailer?
Before every tow, confirm that the hitch coupler is fully seated and pinned, the safety chains are crossed under the tongue and connected, all trailer lights work (running, brake and turn), tire pressure matches the placard spec on both vehicle and trailer, the brake controller is connected and set, roughly 60% of the load sits forward of the trailer axle, and your mirrors let you see past both sides of the trailer.
How often should I do a pre-trip trailer inspection?
Run the full checklist before every trip, then do a quick walk-around at every fuel or rest stop on a long haul. Most tire, light and coupler problems announce themselves early, and a two-minute look at a gas station is what catches them.
Do I need to check my trailer lights before every trip?
Yes, every single trip. Trailer lights are the most commonly failed pre-trip item because connections corrode, bulbs burn out and 7-pin plugs work loose with vibration. A trailer without working brake lights or turn signals is both a serious hazard and illegal in every state.
How do you check trailer hitch safety chains?
Cross the chains in an X pattern under the tongue and connect them to the tow vehicle chain hooks, not the ball mount. They need to be short enough that they never drag on the road and long enough to allow a full turn. If the trailer separates from the hitch, the crossed chains cradle the tongue and keep it off the ground.
How do I check trailer tires before towing?
Measure pressure when the tires are cold and set it to the sidewall rating, not the truck placard. Then inspect for cracks, bulges, flat-spotting and uneven wear. Trailer tires age out before they wear out, so replace anything past its date code even if the tread looks fine.
What is tongue weight and how do I know if it is correct?
Tongue weight is the downward force the coupler puts on the hitch ball, and it should be 10 to 15% of the loaded trailer weight. Too little causes sway; too much overloads the rear axle and makes the steering feel light. Loading about 60% of the cargo forward of the axle usually lands you in range.
Why is a pre-trip inspection important?
Most roadside trailer failures trace back to a skipped check: low tire pressure, an unlatched coupler, a corroded ground on the light circuit, or a load that shifted. None of those are hard to spot standing still. A few minutes of inspection prevents the most common and most dangerous problems.
Reached the bottom?
The same checklist you just read — nothing is hidden behind the form. The emailed version is formatted to print on one page and live in your glovebox, and you will also get short TowPro towing lessons over the following two weeks. Unsubscribe any time.
Email me the printable PDF →Further Reading
- Towing Capacity Explained: How to Find Your Truck’s Limit
- Trailer Sway Control: Why It Happens and How to Stop It
Want to tow with confidence?
Get the complete towing course — built by a driver with 200,000+ miles towed.
TowPro Academy is a step-by-step Class C towing course for truck owners. 55 lessons + a 1,300-page eBook covering everything from hitching to backing up to emergency handling. One-time payment. Lifetime access.
Enroll Now — $99 One-Time →30-day money-back guarantee. Watch on any device.