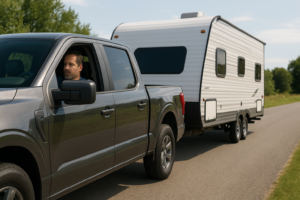
Knowing how to buy a used trailer is one of the best ways to get quality towing equipment without paying new prices. It’s also one of the easiest ways to end up with someone else’s maintenance problems, hidden structural damage, or a trailer that doesn’t match your actual towing needs. The used trailer market is full of great deals — but also full of trailers that have been neglected, overloaded, repaired badly, or are simply the wrong type for the job. This guide walks you through exactly what to inspect, what questions to ask, and what red flags to walk away from before you hand over any money.
Step 1: Know What You Need Before You Shop
Before you look at a single listing, get clear on what you actually need from a trailer. What are you towing? How much does it weigh? What’s the maximum load you’ll ever haul? What’s the GVWR (Gross Vehicle Weight Rating) you need? What hitch type and ball size does your tow vehicle use? Buying a trailer without knowing these answers leads to either an under-rated trailer (dangerous) or an oversized trailer (expensive and impractical). Review our guides on Towing Capacity for Beginners and What Size Trailer Hitch Do I Need? before you start shopping. Know your truck’s towing capacity, payload rating, and recommended hitch class before you evaluate any trailer.
Step 2: Research the Trailer Type and Typical Values
Different trailer types have different price ranges, common failure points, and useful life spans. Utility trailers are typically simple and long-lived. Enclosed cargo trailers are more complex and subject to roof and floor damage. Boat trailers are especially prone to corrosion and bearing failure from saltwater exposure. Travel trailers and fifth wheels depreciate sharply and have complex systems (plumbing, electrical, HVAC) that add inspection complexity. Flatbed car haulers fall in the middle — simple structure, but often heavily used and prone to undercarriage damage. Know what you’re buying before you look at it.
Step 3: Inspect the Frame and Tongue
The trailer frame is the foundation of everything. Start with the tongue — the forward-projecting section that connects to the hitch. Look for any cracks at welds, especially at the junction where the tongue meets the main frame. This is the highest-stress point on any trailer and the first place structural fatigue appears. Use a flashlight if needed to see into corners and under crossmembers. Surface rust is cosmetic, but heavy pitting, deep corrosion, or cracks at welds are serious structural concerns. Press your foot against the tongue firmly — it should be solid with zero flex.
Walk the full perimeter of the frame and look underneath. Floor crossmembers on utility and enclosed trailers rot from underneath, especially if the trailer has been used in wet or salty environments. Tap crossmembers with a wrench — solid steel rings clearly, while rot or serious corrosion produces a dull thud. Any trailer with compromised structural steel should be passed on unless you’re skilled at trailer fabrication and the price reflects the work required.
Step 4: Inspect the Coupler and Hitch Components
The coupler is the part that connects to your hitch ball and is a critical safety component. Open and close the coupler latch — it should snap positively and hold firmly. With the latch closed, try to rock the coupler side to side and up and down. Minimal play is normal; significant slop means the coupler is worn and needs replacement. Check the ball socket size stamped on the coupler — confirm it matches your hitch ball size. A 2-inch coupler on a 2-5/16 ball looks like it fits but will detach. Check that the safety chain attachment points on the tongue are solid — no cracked welds, no bent or elongated holes. For more on hitch and coupler sizing, see What Size Trailer Ball Do I Need?
Step 5: Check the Tires — Including the Date Code
This is the most commonly missed inspection step on used trailer purchases. Trailer tires degrade from age and UV exposure regardless of tread depth. A used trailer with “good” tires can have tires that are structurally compromised due to age. Find the DOT date code on the sidewall — it’s a 4-digit number in an oval near the rim. The last two digits are the year of manufacture. Tires more than 5–6 years old should be budgeted for immediate replacement regardless of how they look. Never buy a trailer with tires older than 8 years without factoring in complete tire replacement as an immediate expense. For the full rundown on trailer tire safety and age limits, see our guide on Trailer Tire Safety. Also check inflation pressure, look for sidewall cracking, and inspect tread for uneven wear (which can indicate a bent axle or wheel alignment issue).
READY TO STOP GUESSING?
LEARN THE RIGHT WAY. TOW ANYTHING. FEAR NOTHING.
Tow with total confidence. 55 video lessons, one-time payment.
ENROLL NOWOne-time payment - 30-Day money-back guarantee
Step 6: Inspect the Wheels, Bearings, and Axles
Grab each wheel and shake it: side-to-side and in-and-out. Any significant play indicates worn wheel bearings. Spin each wheel by hand — it should spin freely and quietly. Grinding, humming, or resistance means the bearings need service at minimum, replacement at worst. Look at the wheel hub covers (also called dust caps) for signs of heat discoloration, which indicates a bearing that has run dry or is failing. Check for any wheel wobble as you spin — this could indicate a bent axle.
If the trailer is a boat trailer or has been used near saltwater, bearing corrosion is extremely common and may not be visible from outside. Budget for a bearing inspection and repack regardless of how the wheels feel. This is cheap insurance against a bearing failure on the highway. See our Trailer Maintenance Schedule for bearing service intervals and what’s involved in a proper repack.
Step 7: Test All Trailer Lights
Ask the seller to let you connect the trailer to your tow vehicle and test all lights. You want to see working brake lights (test by pressing the brake pedal while someone watches the rear), left and right turn signals independently, and running/marker lights. Lighting failures are usually inexpensive to repair, but a complete wiring failure — common on older trailers with corroded wiring — can be a significant job. If the seller can’t or won’t let you test the lights, that’s a yellow flag worth noting.
Step 8: Check the Trailer Brakes (If Equipped)
Many trailers over a certain weight threshold have electric brakes. If the trailer you’re evaluating has brakes, ask the seller to demonstrate they work. With the trailer connected and a brake controller active (your truck’s or a handheld tester), activate the brakes manually at low speed and confirm you feel resistance. Check the brake magnets for wear — a flat-faced, deeply scored magnet is at or past replacement time. Trailers with inoperative brakes may be non-compliant with state law for your towing weight, so factor repair costs into your offer price if brakes are needed. See our guide on Electric Trailer Brakes and Brake Controllers for more detail.
Step 9: Inspect Floors and Interior (Enclosed or Deck Trailers)
For enclosed trailers, inspect the floor for soft spots, rot, or delamination — stand on the floor near the edges and corners and feel for any give. Check the roof seams and walls for signs of water intrusion or past leaks (water stains, delaminated walls, mold smell). For flatbed and car hauler trailers, look for bent or cracked deck boards, severely worn tie-down rails, or damaged ramps. Ramp hinges and pins are often neglected and can be bent or missing — check that ramps deploy and retract smoothly and that the ramp lock pins seat properly.
Red Flags That Should Make You Walk Away
Not every issue is a dealbreaker, but some things should cause you to either significantly renegotiate or walk away entirely. Cracks at welds on the tongue or main frame are structural failures that may not be safely repairable. A severely corroded frame with major pitting is a similar concern. Wheel bearings that grind, seize, or show obvious heat damage suggest a trailer that has been run dry — and the damage may extend to drums, hubs, and axle spindles. Tires that are visibly cracked or severely aged (over 8–10 years old) need immediate replacement. Trailer brakes that are completely non-functional on a heavy trailer represent both a legal and safety issue.
The Bottom Line
A good used trailer is a great investment. A bad one is a money pit and a safety hazard. The inspection process above takes 30–60 minutes and is worth every minute. Know what you need before you shop, inspect every structural and mechanical component systematically, and don’t let a good price override obvious problems. The best used trailer deals are the ones where you spotted the right trailer, verified it was in good condition, and paid a fair price for something that will serve you reliably for years.
Once you have the right trailer, make sure you know how to set it up, load it, and tow it correctly. TowPro Academy’s truck towing course covers everything from hitch setup to weight distribution to backing in 55 structured video lessons for a one-time payment of $50.
Further Reading
- Trailer Tire Safety: Blowout Prevention, Age Limits, and What Every Tower Needs to Know
- What Size Trailer Hitch Do I Need? A Complete Guide
- Trailer Maintenance Schedule: What to Inspect, When, and Why
- Towing Capacity vs. Payload Capacity: What Every Truck Owner Must Know
Stop guessing. Start towing with confidence.
The TowPro Course walks you through every skill in real road scenarios.
Step-by-step video instruction, towing calculators, and a printable checklist — everything in one place for $50.
Enroll Now — $50 →Read Next
- What Is GVWR?
- Trailer Tire Safety
- Towing Glossary: A–Z Definitions for Every Tower
- New to Towing? Start Here
- Complete Beginner’s Guide to Trailer Towing
Frequently Asked Questions
What should I check before buying a used trailer?
Inspect the frame for rust and cracks, check the tires and bearings, test all lights, examine the coupler and safety chains, and verify the floor and axles are solid. Confirm the title and VIN match the trailer.
How do I know if a used trailer’s frame is safe?
Look for straight rails with no bends, no deep rust or flaking metal, and clean, uncracked welds. Any structural rust near the tongue, crossmembers, or axle mounts is a serious red flag.
Do I need a title to buy a used trailer?
In most states, yes. A matching title and VIN protect you from buying a stolen trailer and are required for registration. Requirements vary, so check your state’s DMV rules before you pay.
What used trailer problems are most expensive to fix?
Frame damage, bent axles, and rotted floors are the costliest repairs and often make a trailer not worth buying. Tires, lights, and bearings are cheaper wear items you can factor into your offer.
Learn More with TowPro Academy
Ready to master every aspect of safe, confident towing? The full TowPro Academy towing course walks you through hitching, weight distribution, braking, backing up, and real-world road handling step by step — so you can hit the road prepared and tow with total confidence.
FREE DOWNLOAD
The Towing Safety Checklist Every Tower Needs
Stop guessing. Use this exact pre-trip checklist to stay safe every time you hitch up. Download it free — no experience required.
⬇ Get My Free ChecklistFree PDF · No spam, ever · Unsubscribe any time
RELATED ARTICLES
- ›Night Towing: Tips and Techniques for Safe After-Dark Driving
- ›Towing Laws by State: What Every Driver Needs to Know
- ›Trailer Maintenance Schedule: What to Inspect, When, and Why
- ›How to Tow a Car on a Flatbed Trailer: The Complete Guide
Ready to put it all together? Enroll in TowPro Academy and master safe towing in 55 step-by-step lessons.
Related Articles


FREE DOWNLOAD
Never Miss a Safety Check Again
The exact 66-point checklist Jeff uses on every tow, so small problems get caught before they become breakdowns. Free and printable, zero guesswork.
✅ Get the Free Checklist